...
- Log into your Jira instance as an admin.
- Click the admin dropdown and choose Add-ons. The Find new add-ons screen loads.
- Locate Excel Online Integration.
- Click Free trial to download and install your add-on.
- You're all set! Click Close in the Installed and ready to go dialog.
Configure a new Microsoft app
- Navigate to the Microsoft app registration portal at https://apps.dev.microsoft.com/.
- Sign in with your work Microsoft account.
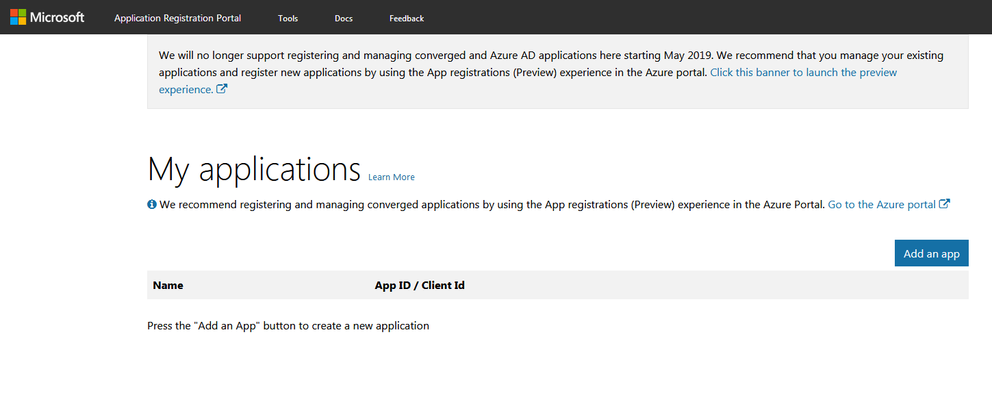
- You should now be looking at your list of Microsoft apps, a screen that looks similar to this:
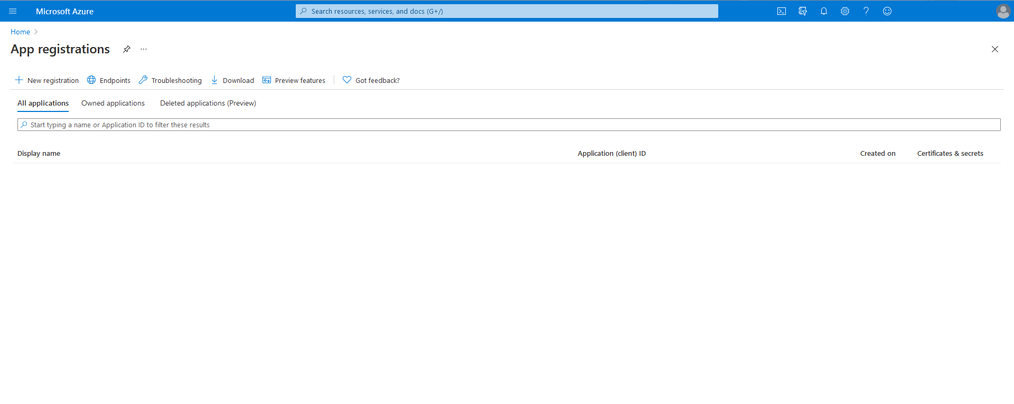
- You will be registering this app through the Azure portal. Click on the gray banner at the top to launch the preview experience in the Azure portal.
- You should now be looking at the Azure portal's app registration screen, which should look similar to this:
- Click the Register an application button.
- On the Register an application screen, enter a name for your new Microsoft app, and tick the appropriate radio button for you use case in the Supported account types section.
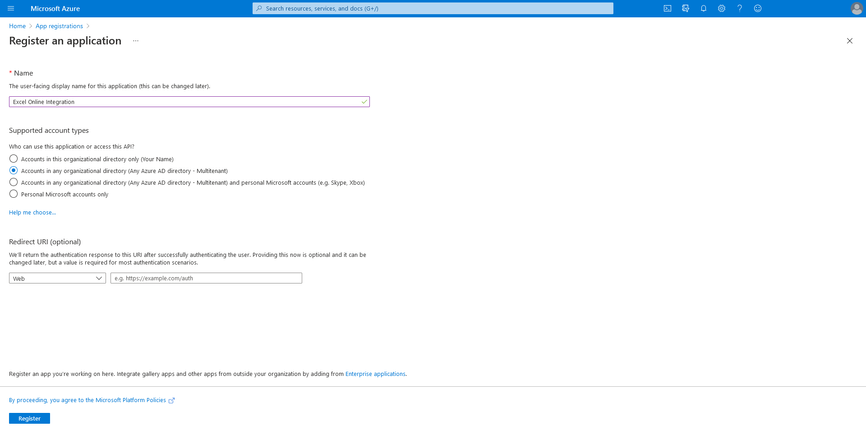
- Click the Register button at the bottom of the screen. After successful registration, you will be taken to the new app's management screen:
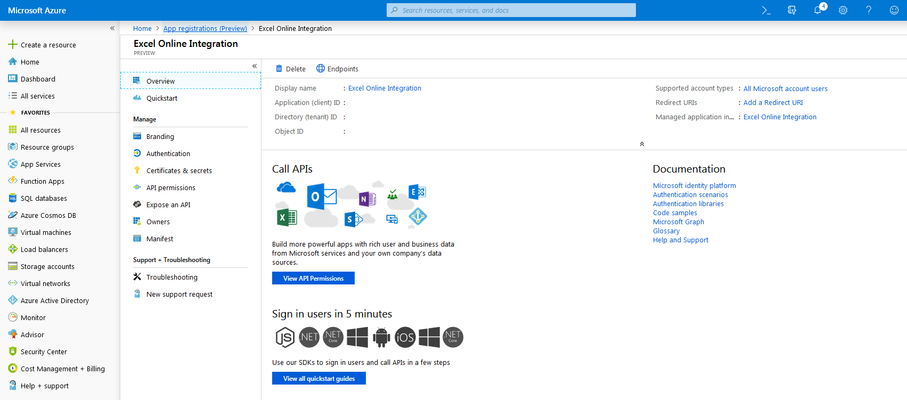
- Copy the Application (client) ID value from this screen to use for the Jira add-on configuration later.
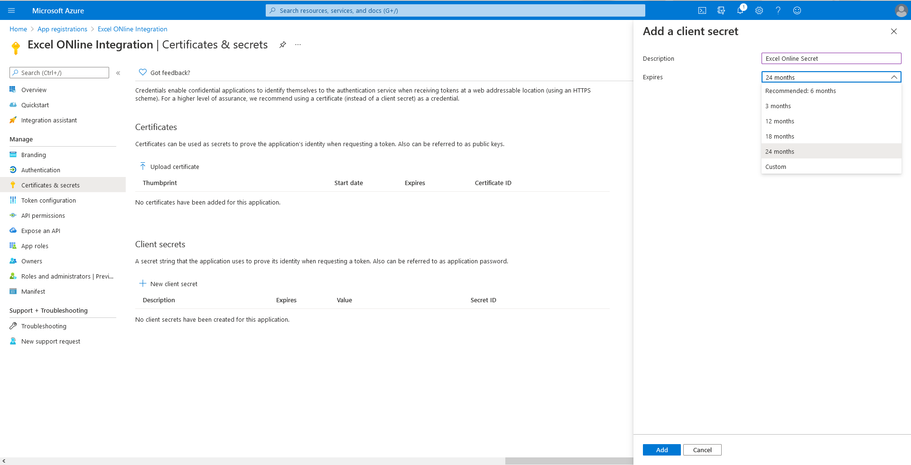
- From the management screen's Manage menu, choose Certificates & secrets.

- Generate a new Client secret by clicking the New client secret button.
- Provide a description and expiration for your app's new client secret.
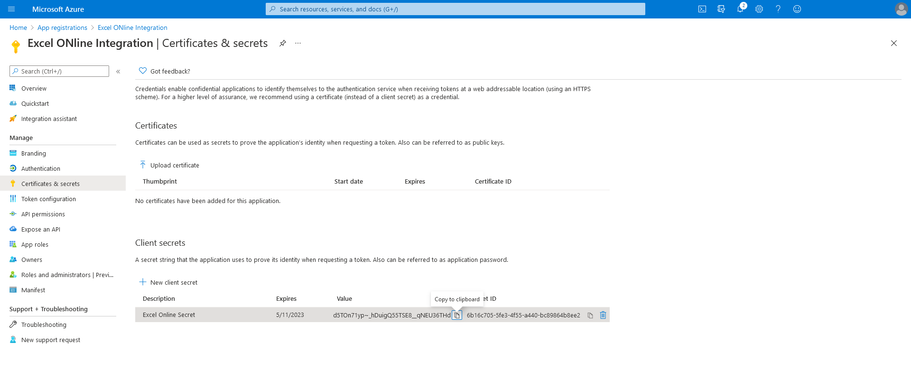
- Click the Add button. The Certificates & secrets screen will refresh with the new client secret.
- Copy the Value shown on this screen for the new client secret to use for the Jira add-on configuration later.
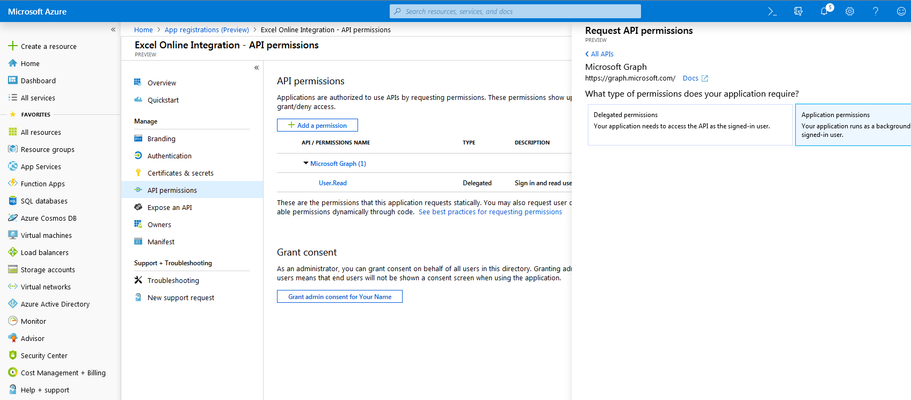
- From the management screen's Manage menu, choose API permissions.
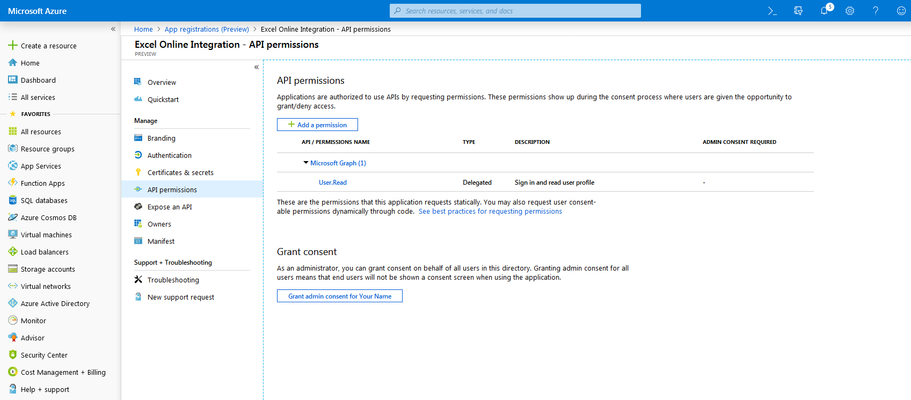
- Click the Add a permission button and choose the Microsoft Graph banner at the top.
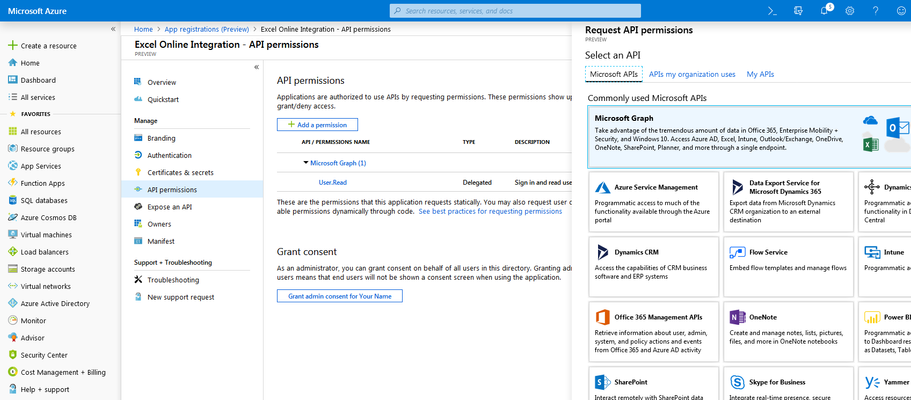
- Click the Application permissions banner on the right.
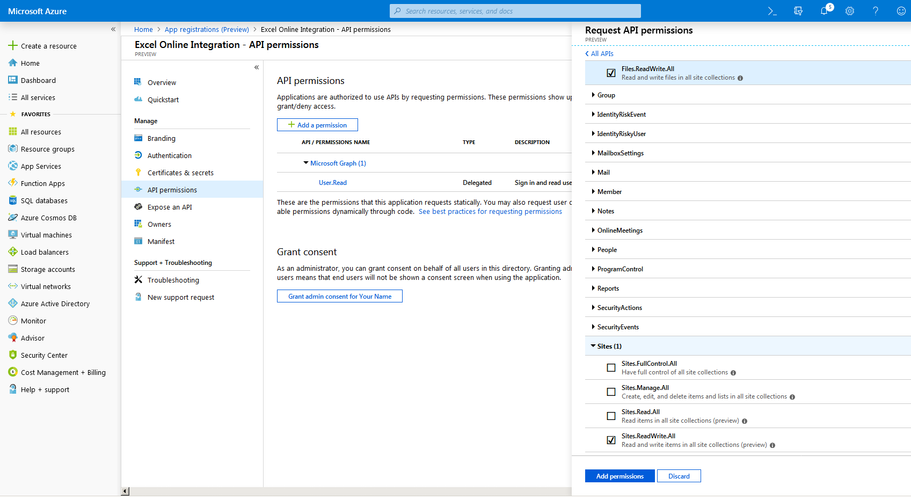
- Tick the checkboxes necessary to enable the Files.ReadWrite.All permission in the Files section, and the Sites.ReadWrite.All permission under the Sites section, then click the Add permissions button.
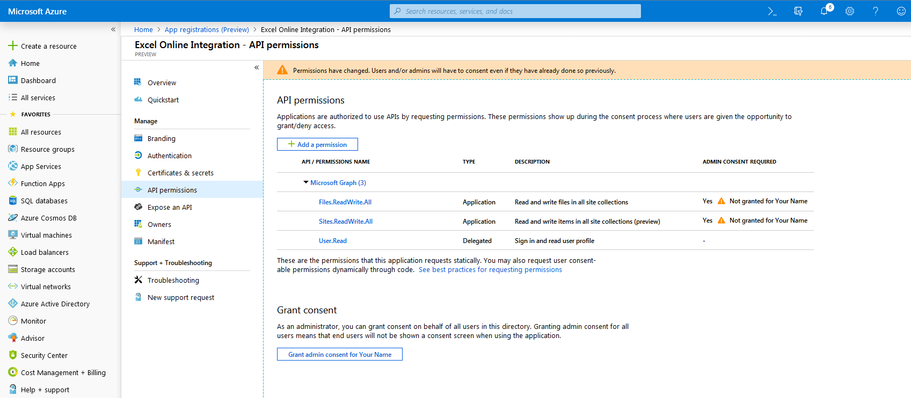
- Finally, after adding the necessary permissions, click the Grant admin consent for (Your Name) button under the Grant consent section on the API permissions screen and confirm the dialog.
...
- In Jira, click on the Jira settings/gear action from the navigation menu on the left, and choose the Apps item.
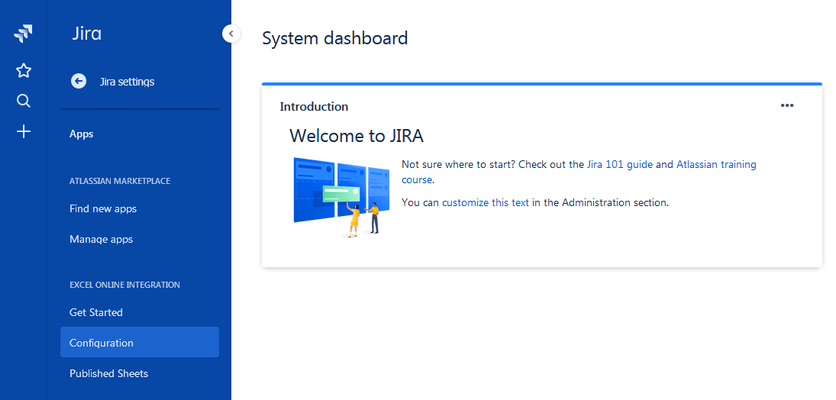
- Under the Excel Online Integration heading, choose Configuration.
- On the Configuration screen, enter your Microsoft domain, the Application ID, and the Client Secret value. After entering these values, a Test button will appear. Click this button to confirm that the Microsoft app and Jira add-on have been set up properly.
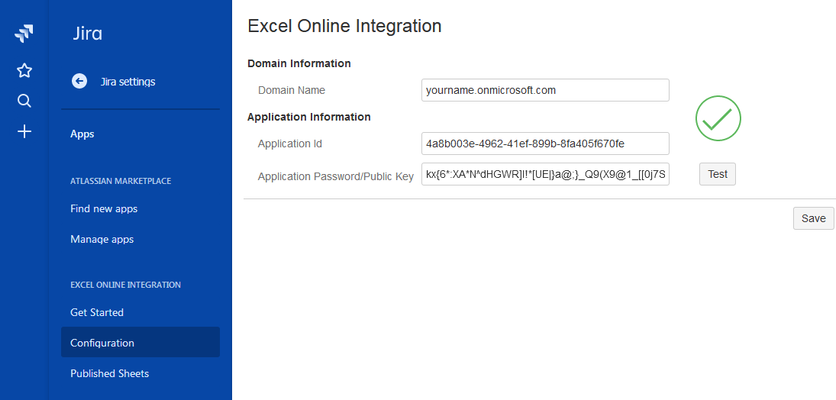
- Click the Save button.
Now the setup is complete, continue to the Jira Add-On Configuration page for more information on configuring the add-on.