Installation
The Excel Online Integration Jira add-on lets you effortlessly export an issue list from issue searches to Excel Online. Follow the installation instructions below.
Install the Add-On
- Log into your Jira instance as an admin.
- Click the admin dropdown and choose Add-ons. The Find new add-ons screen loads.
- Locate Excel Online Integration.
- Click Free trial to download and install your add-on.
- You're all set! Click Close in the Installed and ready to go dialog.
Configure a new Microsoft app
Note: Jira Cloud users who only intend to download Excel spreadsheets to their local machines can skip this section. Continue to Export Issues. If additional worksheet options need be enabled or issue export limits increased this can be accomplished on the Jira Add-on Configuration section.
- Navigate to the Microsoft app registration portal at https://portal.azure.com/#blade/Microsoft_AAD_RegisteredApps/ApplicationsListBlade.
- If necessary, sign in with your work Microsoft account.
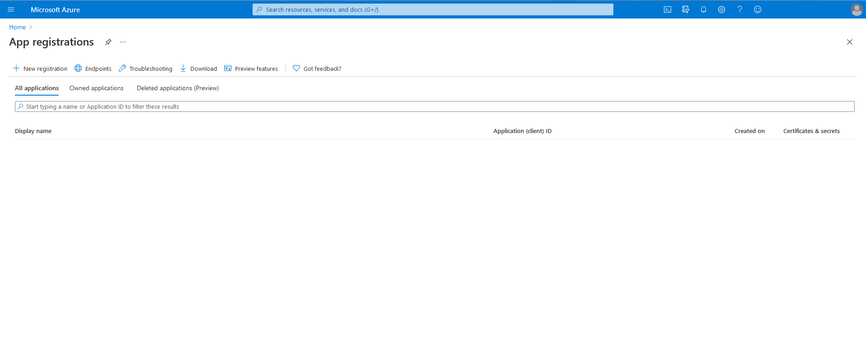
- You should now be looking at your list of Microsoft app registrations in the Azure portal, a screen that looks similar to this:
- Click the New registration item at the top of the screen.
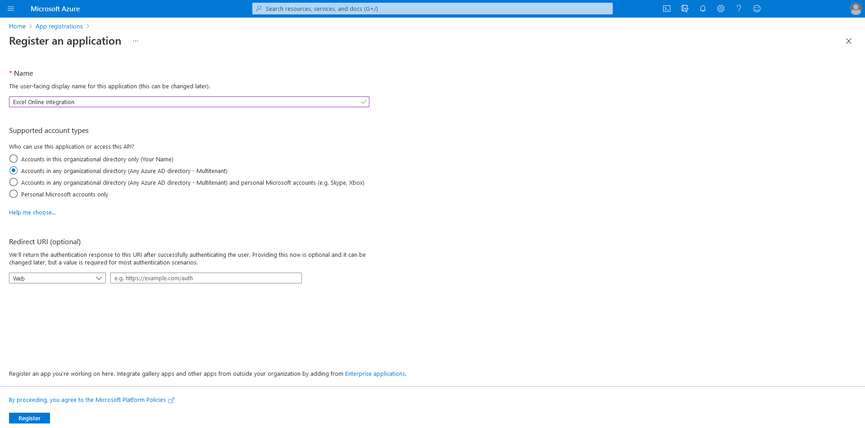
- On the Register an application screen, enter a name for your new Microsoft app, and tick the appropriate radio button for your use case in the Supported account types section.
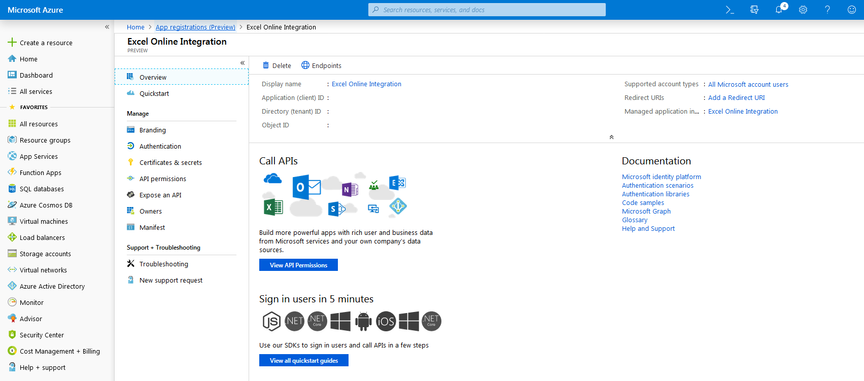
- Click the Register button at the bottom of the screen. After successful registration, you will be taken to the new app's management screen:
- Copy the Application (client) ID value from this screen to use for the Jira add-on configuration later.
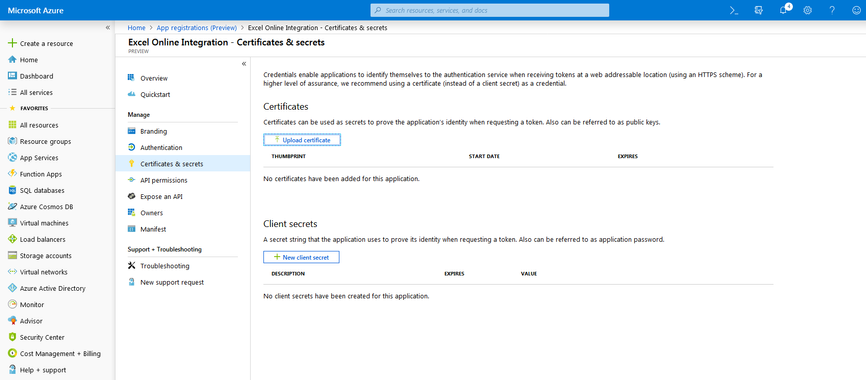
- From the management screen's Manage menu, choose Certificates & secrets.
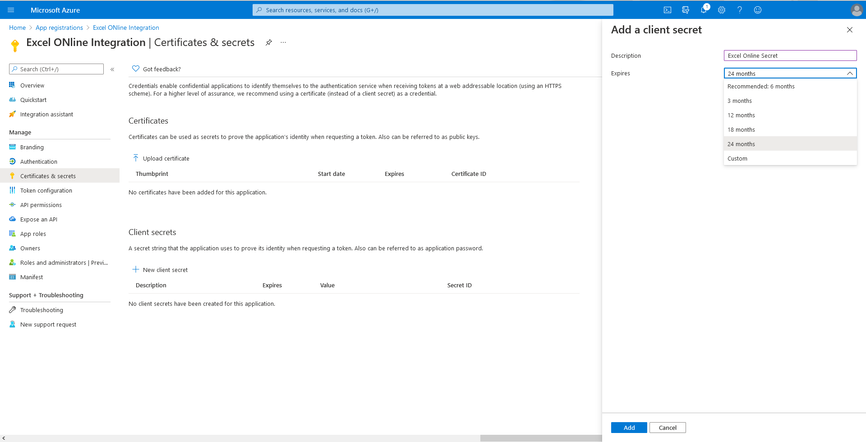
- Generate a new Client secret by clicking the New client secret button.
- Provide a description and expiration for your app's new client secret.
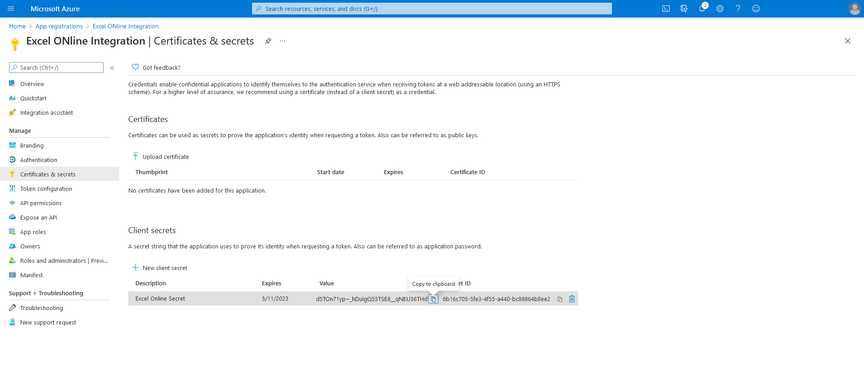
- Click the Add button. The Certificates & secrets screen will refresh with the new client secret.
- Copy the Value shown on this screen for the new client secret to use for the Jira add-on configuration later.
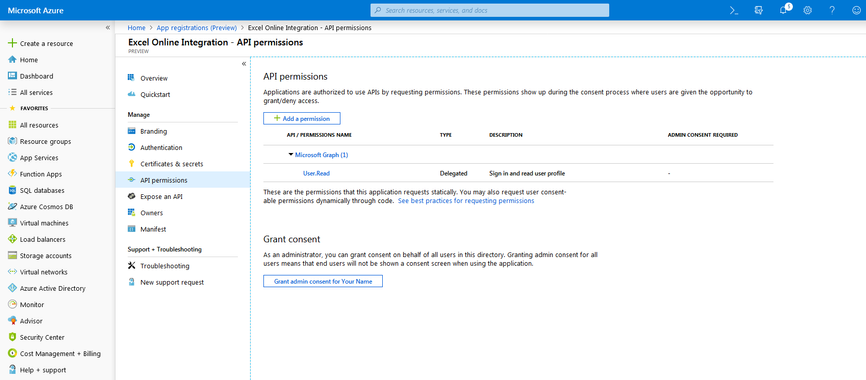
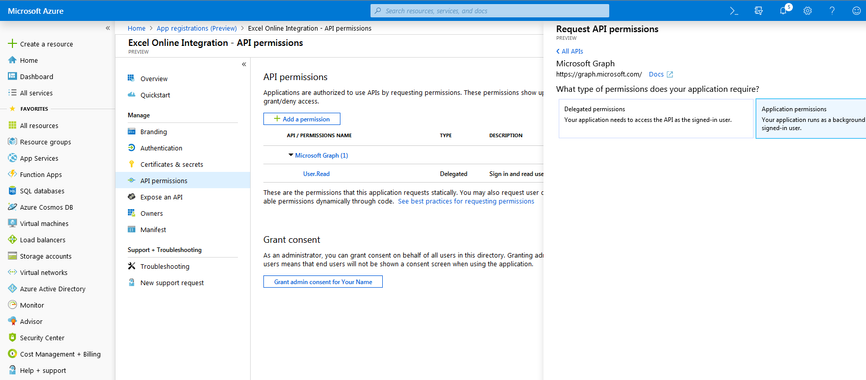
- From the management screen's Manage menu, choose API permissions.
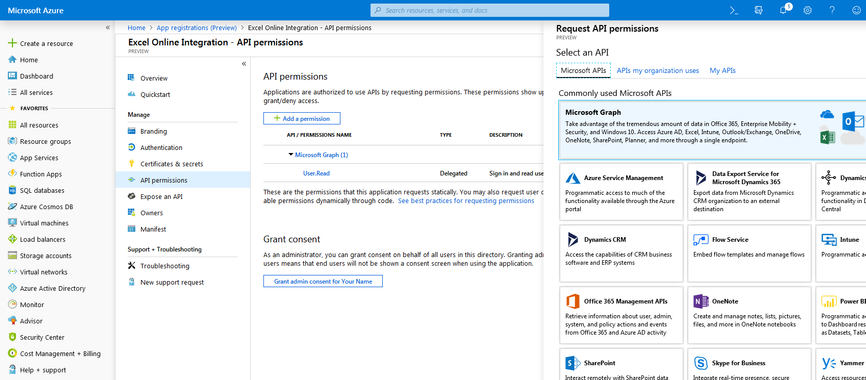
- Click the Add a permission button and choose the Microsoft Graph banner at the top.
- Click the Application permissions banner on the right.
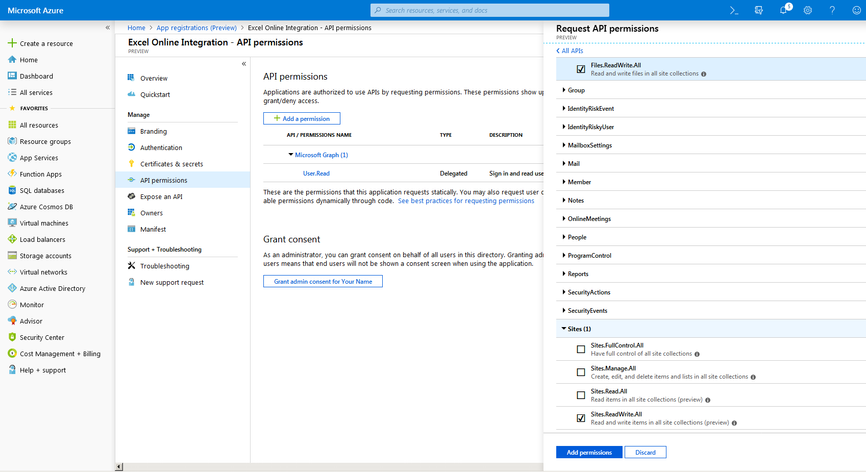
- Tick the checkboxes necessary to enable the Files.ReadWrite.All permission in the Files section, and the Sites.ReadWrite.All permission under the Sites section, then click the Add permissions button.
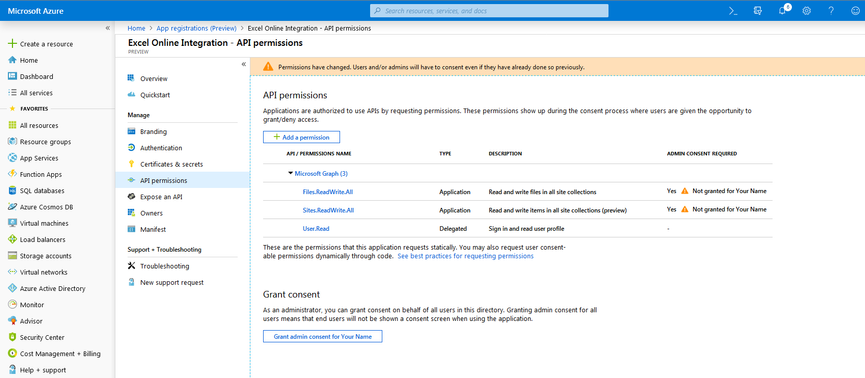
- Finally, after adding the necessary permissions, click the Grant admin consent for (Your Name) button on the API permissions screen and confirm the dialog.
Configure the Add-on
Before starting add-on configuration, make sure you have the Application ID and Client secret value created from the Configure a new Microsoft app steps earlier.
To use the integration, you have to configure the add-on to be able to communicate with your Microsoft online account through the new app you created in the steps earlier. To configure the add-on, complete the following steps:
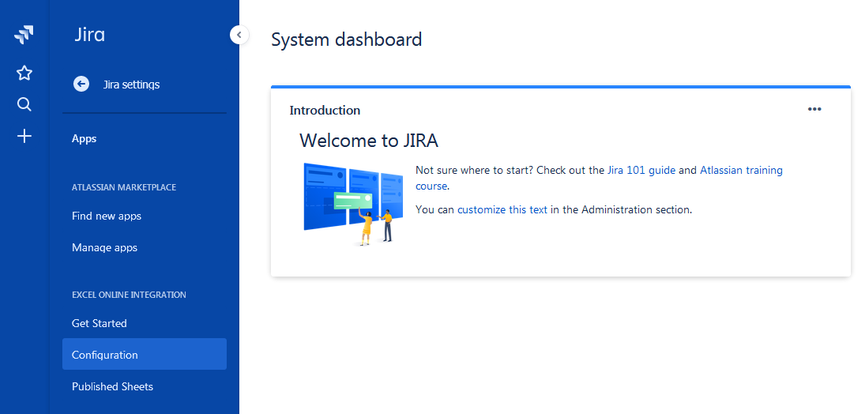
- In Jira, click on the Jira settings/gear action from the navigation menu on the left, and choose the Apps item.
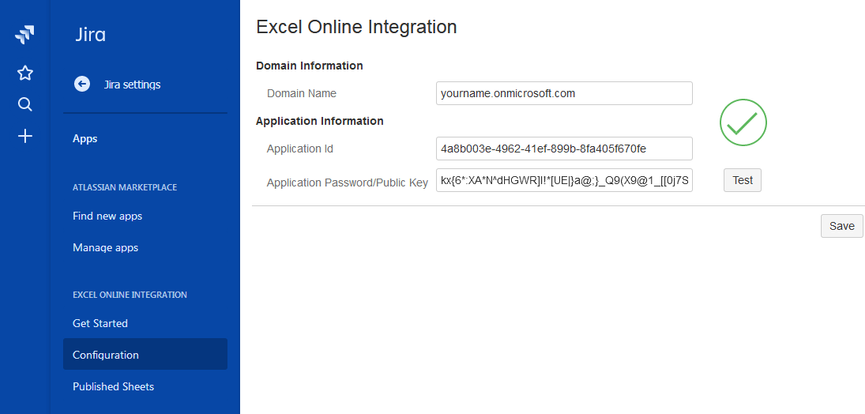
- Under the Excel Online Integration heading, choose Configuration.
- On the Configuration screen, enter your Microsoft domain, the Application ID, and the Client Secret value. After entering these values, a Test button will appear. Click this button to confirm that the Microsoft app and Jira add-on have been set up properly. If the test fails, a message describing the issue will be displayed on the screen. If you need additional help, please contact us.
- Click the Save button.
Now the setup is complete, continue to the Jira Add-On Configuration page for more information on configuring the add-on.
