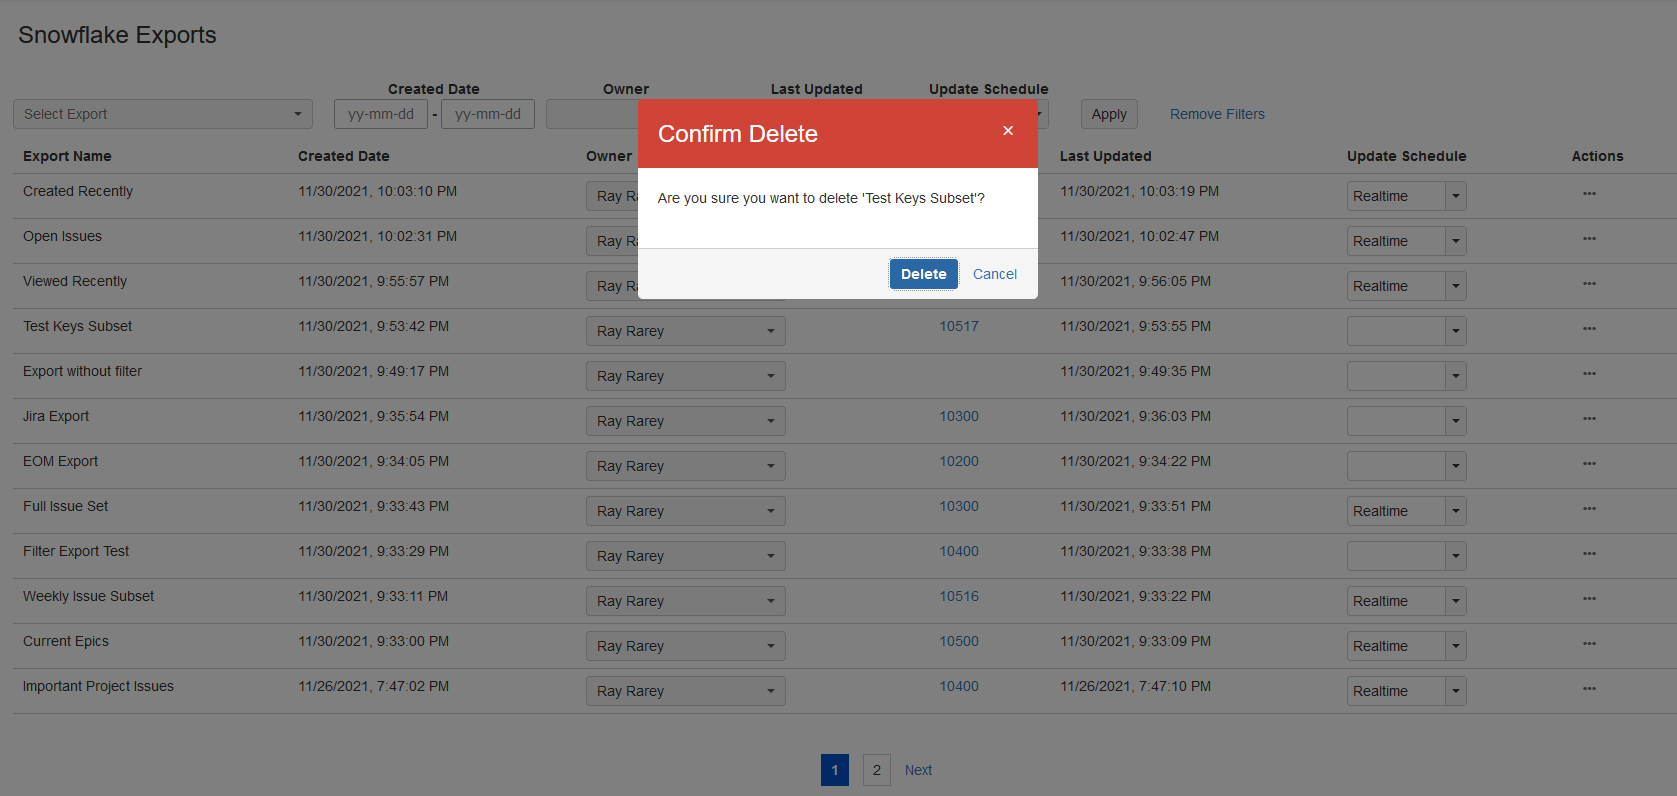
The Snowflake Exports screen for the add-on allows Jira administrators to monitor and maintain all of the exports created by the add-on. Administrators can perform the following actions from the Snowflake Exports screen:
- Search for Exports
- Change an Export's Update Schedule
- Change an Export's Owner
- Update an Export
- Delete an Export
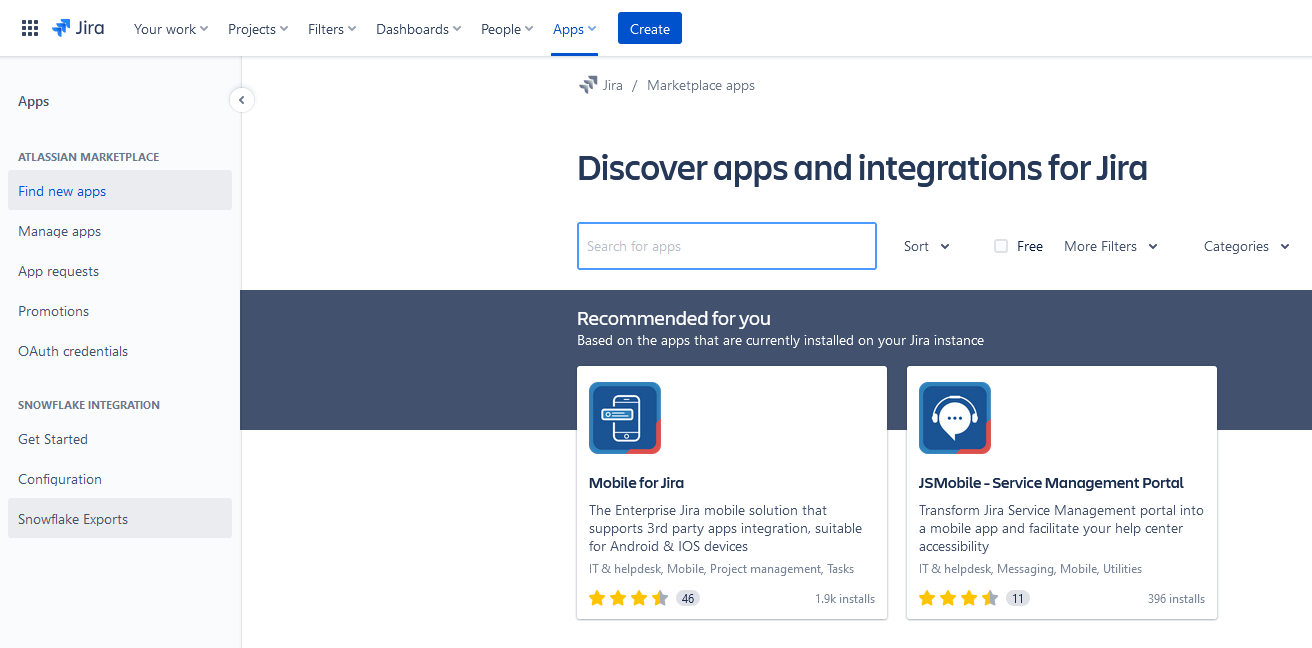
To access the Snowflake Exports screen, navigate to the Jira apps administration section in your Jira instance, and on the left side you will find the Snowflake Exports link under a Snowflake Integration heading.
Click this link to access the Snowflake Exports screen.
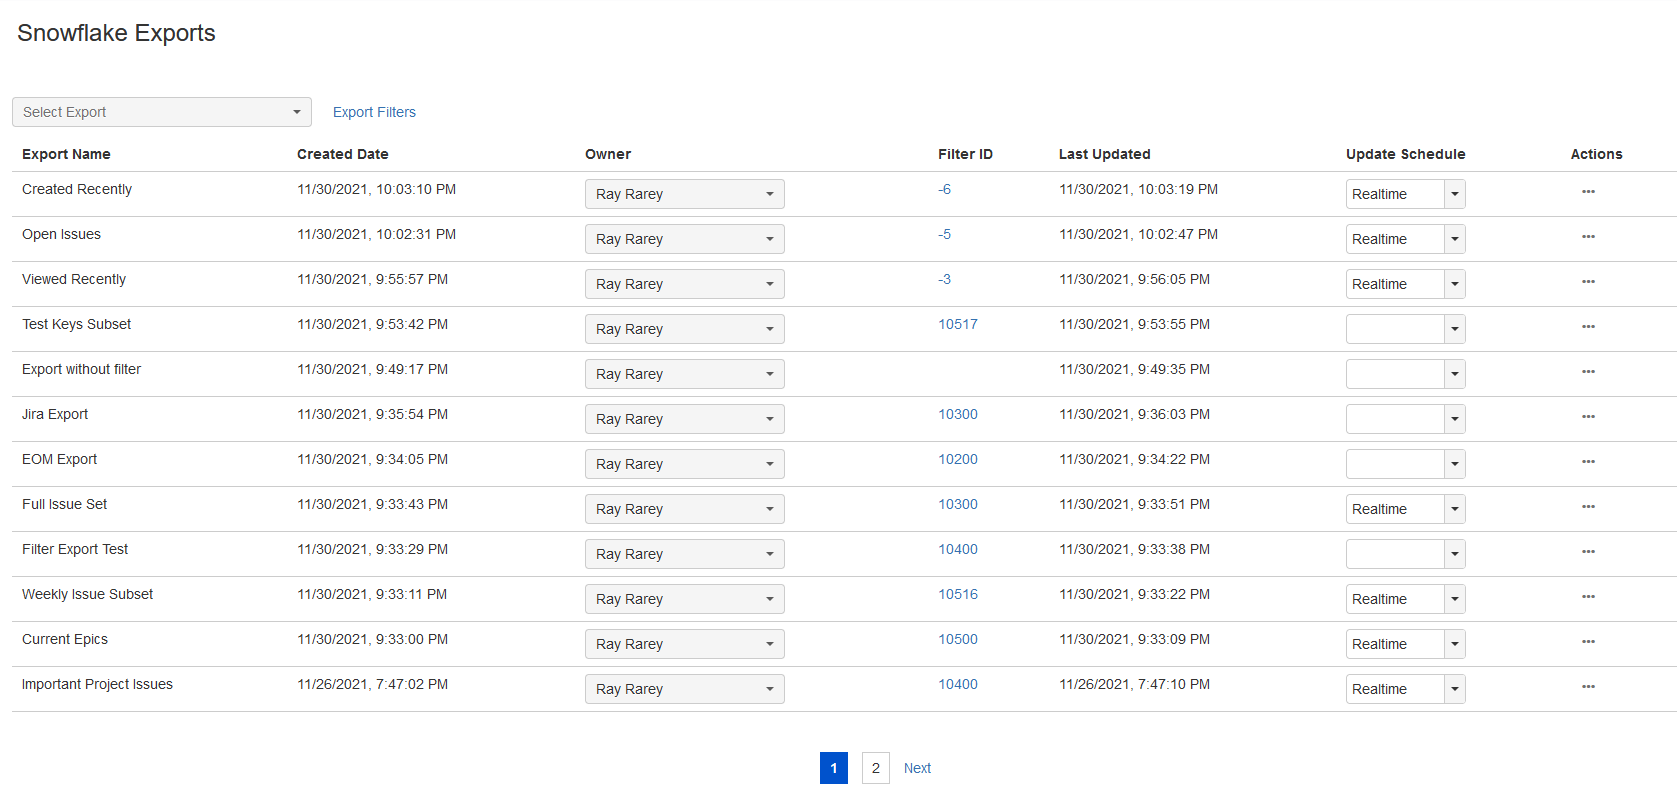
The Snowflake Exports screen shows a table listing every export created by the add-on, one per row, in descending order by created date. The list is split into multiple pages if enough exports have been created. You can also jump directly to an export on any page by selecting the export from the Select Export drop down at the top of the screen.
Each row in the table includes the following information:
- The export name
- The date and time when the export was created
- The Jira user display name of the user who owns the export
- The ID of the search filter used for the list of Jira issues in the export (if applicable)
- The date and time when the export was last updated
- The export's update schedule (if applicable)
- The Actions button, to perform additional actions on an export
From the Snowflake Exports screen, Jira administrators can perform the following actions on the exports:
Search for Exports
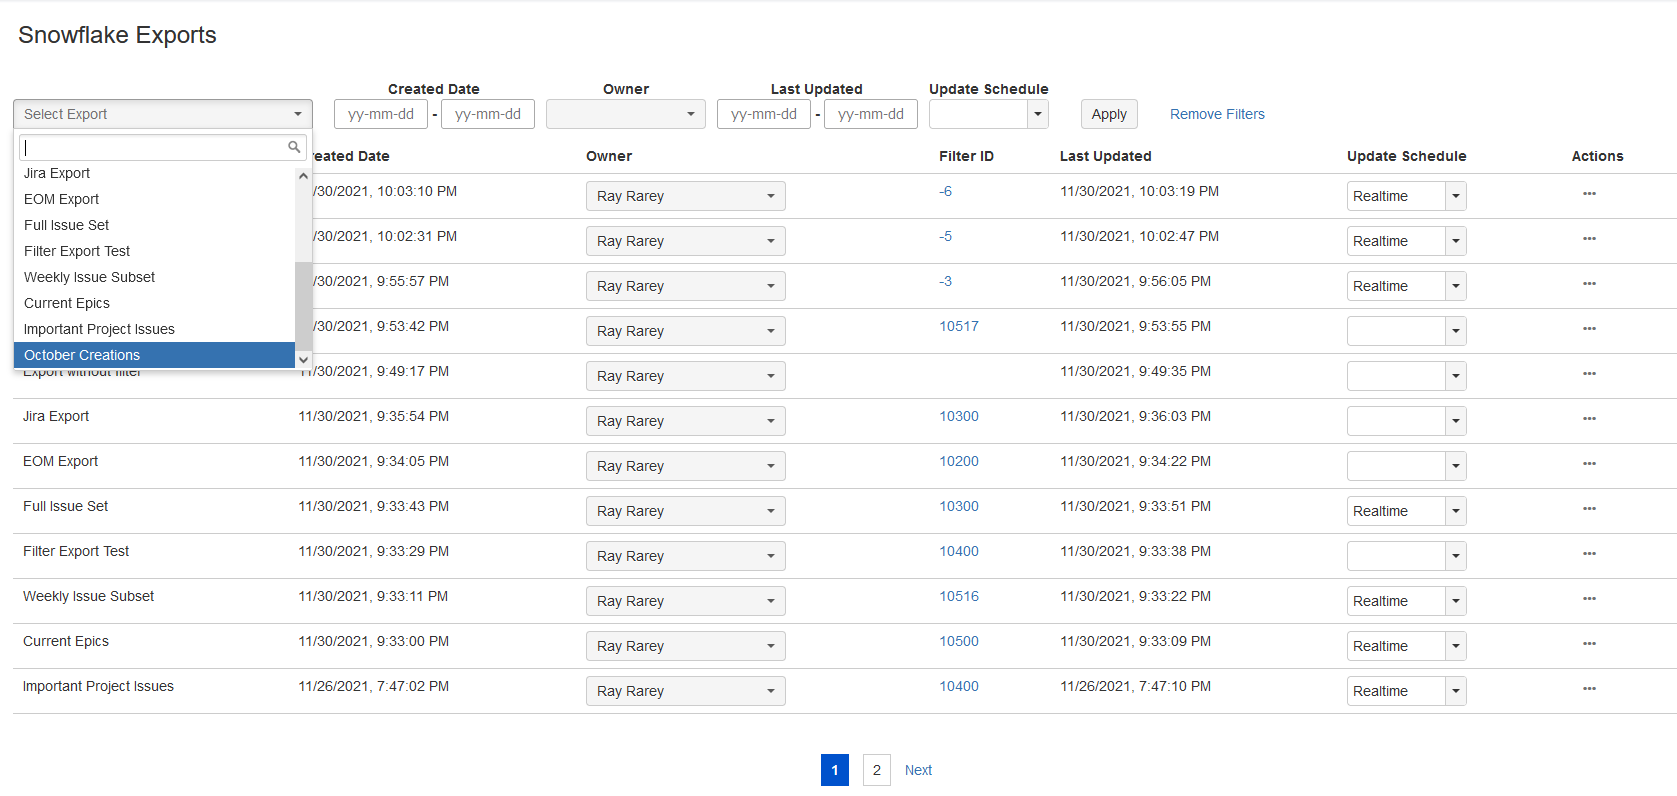
The Select Export drop down allows a user to search for exports by name and then jump to that export's listing by selecting it from the drop down. Additional filtering options are available by clicking on the Export Filters item next to the Select Export drop down:
Filters allow you to find exports:
- That were created during a specific date range
- That are owned by a particular user
- That were last updated during a specific date range
- That have a particular update schedule
Fill in the values for any combination of filters and click Apply to show only the exports that match your filter criteria. To remove filters and restore the complete list of export, click on the Remove Filters item at the end of the row.
Additional notes on filtering:
- For date range filters, you may leave either the start date or end date blank. Leaving the start date blank will make the filter include all exports with a date that falls on or before the end date. Leaving the end date blank will make the filter include all exports with a date that falls on or after the start date.
- For the Update Schedule filter, select None for exports that do not have an update schedule set (manual update exports). Leaving the selection empty ignores the export's update schedule when filtering.
- To clear the Owner filter, place your cursor in the drop down and select the blank option.
- If multiple filters have values provided, the filters are combined with AND logic.
- When filters are applied, the Select Export drop down uses the same filter as the Snowflake Exports page.
Change an Export's Owner
To change an export's Jira owner from the Snowflake Exports screen, click on the owner drop down and choose a new owner from the user picker. Changes to export owners take effect immediately. This controls which user can see the export on the Export screen in the Update Existing Export drop down.
Change an Export's Update Schedule
To change an export's update schedule from the Snowflake Exports screen, select a new schedule option from the drop down in the Update Schedule column. Changes to export update schedules take effect immediately.
If an export is missing information necessary to determine or set it's update schedule, an information icon () will appear in this column instead of a drop down. In this situation the export may have to be recreated from the Export screen.
Update an Export
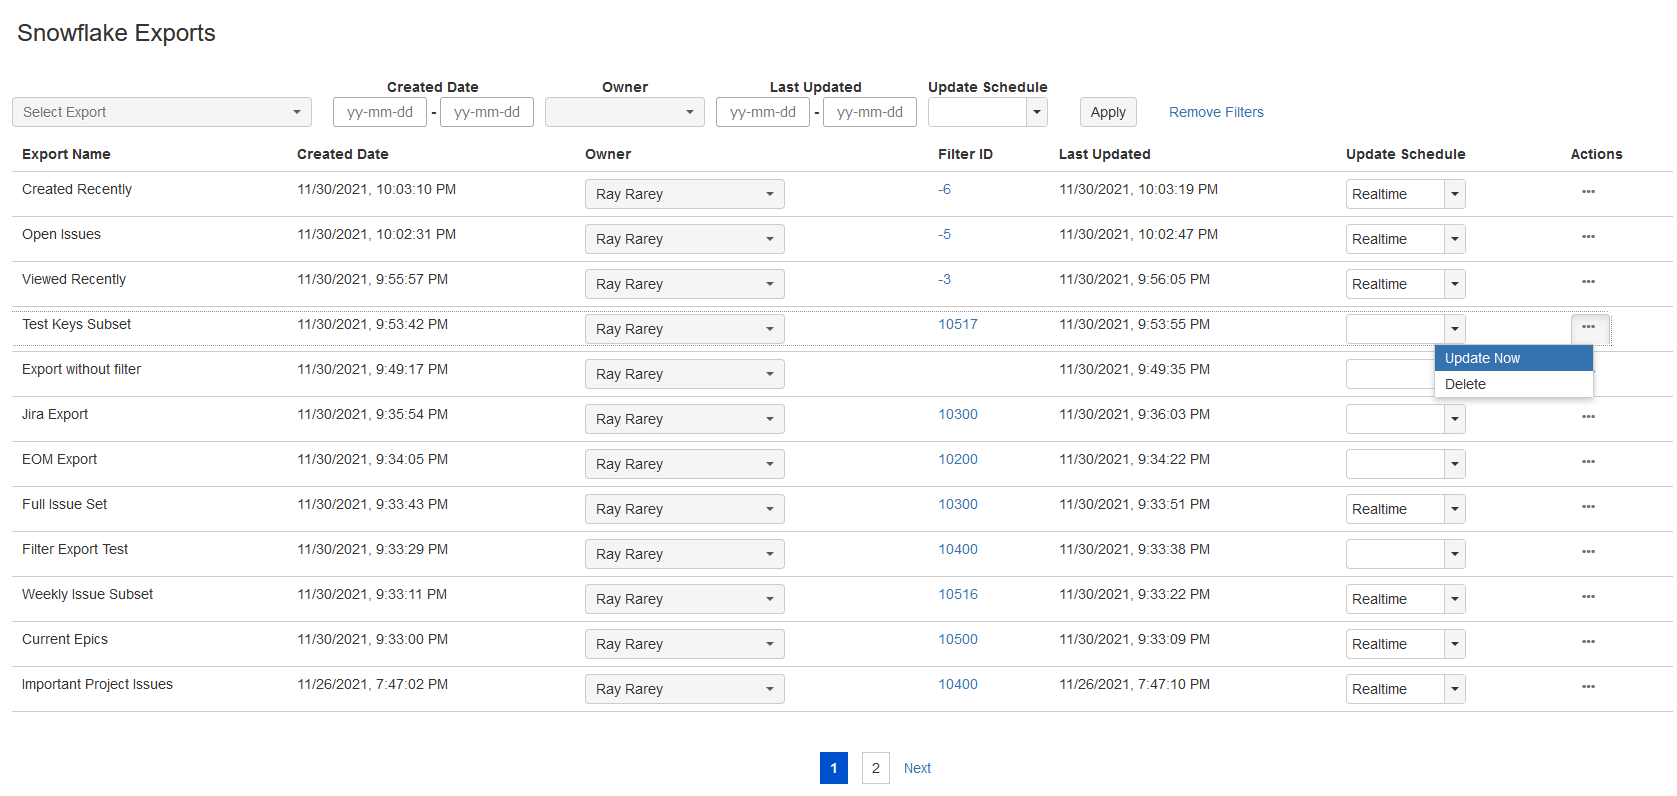
Sometimes it is necessary to refresh all of the Jira issue data in an export. To do this from the Snowflake Exports screen, simply click the Actions button for the export you wish to update, then choose Update Now from the Actions menu. Updating all issue data in a export sometimes takes a while, so please be patient. Once the process is complete, a success dialog will appear on the screen, and the export's Last Updated column value will change to reflect the recent update.
Delete an Export
The Snowflake Exports screen allows a Jira administrator to easily delete an export. Simply click the Actions button for the export you wish to remove, then choose Delete from the Actions menu, and confirm your request.
