Installation
- Ray Rarey
- Martin Luethi
The Snowflake Integration Jira add-on lets you effortlessly export an issue list from issue searches to Snowflake. Follow the installation instructions below.
Install the Add-On
- Log into your Jira instance as an admin.
- Click the administration gear in the top right corner and select Apps. The Find new apps screen loads.
- Locate Snowflake Integration.
- Click Free trial to download and install your add-on.
- You're all set! Click Close in the Installed and ready to go dialog.
Configure Snowflake
To export Jira issue data to Snowflake, you will need a database in Snowflake, user credentials to access that database, and your Snowflake account identifier.
Snowflake for Jira supports the following authentication types:
- Username and Password (deprecated)
- Key Pair
Each of these authentication types requires you to provide different Snowflake connection information to the Snowflake Integration Configuration screen. For more information on configuring Key Pair authentication, please review the Snowflake Authentication Documentation.
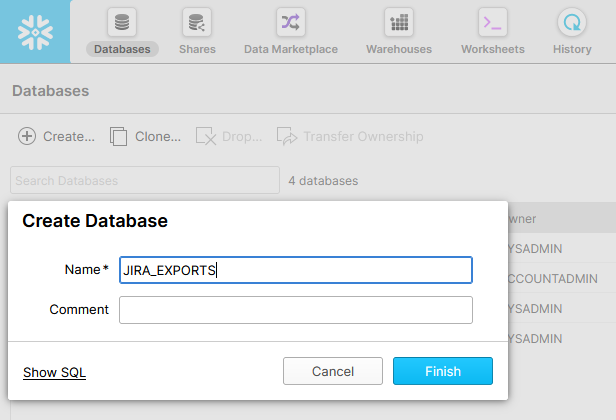
If you do not already have a database for exports, create one in Snowflake by following the steps below.
- Log in to Snowflake, click on the Databases icon in the top left, and then click on the Create icon beneath it.

- Supply a name for your new database, and click Finish.
Next, make sure that you have the user credentials necessary to access and modify this database and any schemas within in where you would like to store exports. The user will need to have the following privileges:
- BEGIN TRANSACTION
- COMMIT
- CREATE TABLE
- ALTER TABLE
- DELETE TABLE
- INSERT
- SELECT
- UPDATE
- USE SCHEMA
This user will also need to be assigned to a warehouse within Snowflake. You can choose to give the user ALTER USER and USE WAREHOUSE permissions and let our add-on assign the warehouse automatically, or you can assign the warehouse manually by executing the following command within Snowflake: ALTER USER $USER_NAME SET DEFAULT_WAREHOUSE="$WAREHOUSE_NAME". Replace $USER_NAME and $WAREHOUSE_NAME with the appropriate values for your user and warehouse.
Please see the Snowflake Access Control documentation for additional information on these privileges and how to apply them to a user in your instance.
Finally, you will need your Snowflake account identifier. The preferred method of identifying your account is the format <orgname>-<account_name>. This information can be found in the menu at the bottom left of Snowflake. Click on the menu and make a note of your organization name and account identifier as shown below:
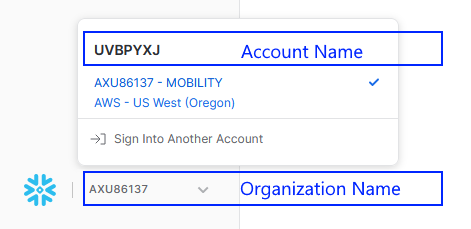
If you are having trouble finding the necessary identifiers, please refer to the Snowflake documentation.
With a database, schema(s), user credentials, and account identifier, you're ready to move on to the next steps and configure the Jira add-on.
Configure the Add-On
To use the integration, you have to configure the add-on.
In Jira, click on the administration gear in the top right corner and select Apps.

Click Manage Apps on the left side and search for the Snowflake Integration add-on in the list of installed apps. Then click on the Configure button.
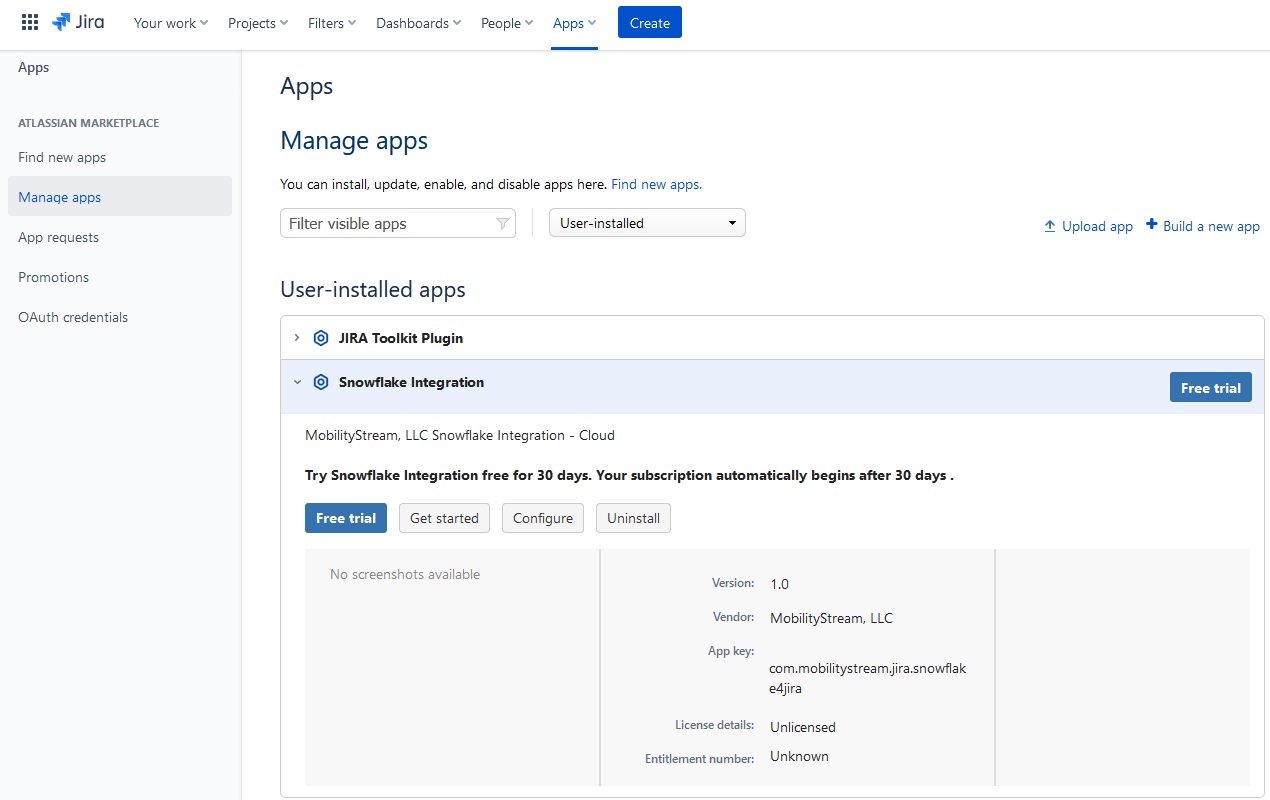
Now you can enter the credentials and account information from the Configure Snowflake steps. Select your authentication type from the Authentication Type drop down and enter the information in the displayed fields. When you are finished, click the Test button to confirm your connection information is correct. If the test fails, return to Snowflake and confirm your user has the necessary permissions. If you have any network policies in place in Snowflake, make sure you have whitelisted the AWS infrastructure IP addresses. If the test passes, click the Save Configuration button.

Now that setup is complete, continue to the Snowflake Integration Configuration screen for more information on configuring the add-on.