My Snowflake Exports
- Ray Rarey
- MobilityStream Team
The My Snowflake Exports screen for the add-on allows Jira users to quickly reference all of the exports they currently own. Users can perform the following actions from the My Snowflake Exports screen:
- Search for Exports
- Change an Export's Update Schedule
- Update an Export
- Add Issue Data to an Export
- Delete an Export
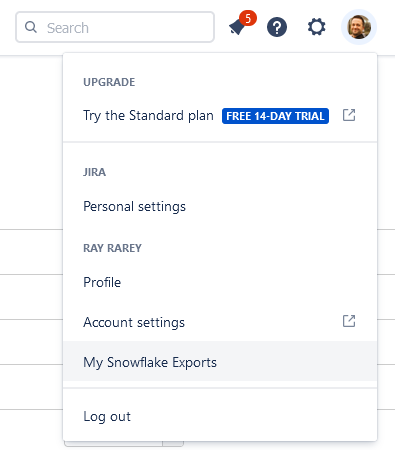
To access the My Snowflake Exports screen, click on the My Snowflake Exports item in your user profile menu from the top right in Jira:

The My Snowflake Exports screen shows a table listing every export owned by the current user, one per row, in descending order by created date. The list is split into multiple pages if enough exports have been created. You can also jump directly to an export on any page by selecting the export from the Select Export drop down at the top of the screen.
Each row in the table includes the following information:
- The export name
- The date and time when the export was created
- The ID of the search filter used for the list of Jira issues in the export (if applicable)
- The number of Jira issues in the export
- The date and time when the export was last updated
- The export's update schedule (if applicable)
- The Actions button, to perform additional actions on an export
From the My Snowflake Exports screen, Jira users can perform the following actions on the exports:
Search for Exports
The Select Export drop down allows a user to search for exports by name and then jump to that export's listing by selecting it from the drop down. Additional filtering options are available by clicking on the Export Filters item next to the Select Export drop down:

Filters allow you to find exports:
- That were created during a specific date range
- That were last updated during a specific date range
- That have a particular update schedule
Fill in the values for any combination of filters and click Apply to show only the exports that match your filter criteria. To remove filters and restore the complete list of exports, click on the Remove Filters item at the end of the row.
Additional notes on filtering:
- For date range filters, you may leave either the start date or end date blank. Leaving the start date blank will make the filter include all exports with a date that falls on or before the end date. Leaving the end date blank will make the filter include all exports with a date that falls on or after the start date.
- For the Update Schedule filter, select None for exports that do not have an update schedule set (manual update exports). Leaving the selection empty ignores the export's update schedule when filtering.
- If multiple filters have values provided, the filters are combined with AND logic.
- When filters are applied, the Select Export drop down uses the same filter as the My Snowflake Exports page.
Change an Export's Update Schedule
To change an export's update schedule from the My Snowflake Exports screen, select a new schedule option from the drop down in the Update Schedule column. Changes to export update schedules take effect immediately.
If an export is missing information necessary to determine or set it's update schedule, an information icon (i) will appear in this column instead of a drop down. In this situation the export may have to be recreated from the Export screen.
Update an Export
Sometimes it is necessary to refresh all of the Jira issue data in an export. To do this from the My Snowflake Exports screen, simply click the Actions button for the export you wish to update, then choose Update Now from the Actions menu. Updating all issue data in a export sometimes takes a while, so please be patient. Once the process is complete, a success dialog will appear on the screen, and the export's Last Updated column value will change to reflect the recent update.

Add Issue Data to an Export
You may want to quickly perform an incremental update on an existing export, instead of a full refresh. If the Issues column shows that an export contains fewer issues than its query returns from Jira, click the Actions button and choose Add Issue Data to add the new Jira issues to the export.

Delete an Export
The My Snowflake Exports screen allows a Jira user to easily delete an export. Simply click the Actions button for the export you wish to remove, then choose Delete from the Actions menu, and confirm your request.
